
Time Tracking
Time Tracking can be enabled via Organization Settings > Features. You can pick between two modes:
- Manual
- Real-time and Manual
If time tracking is disabled, no exisiting time tracking information will be lost.
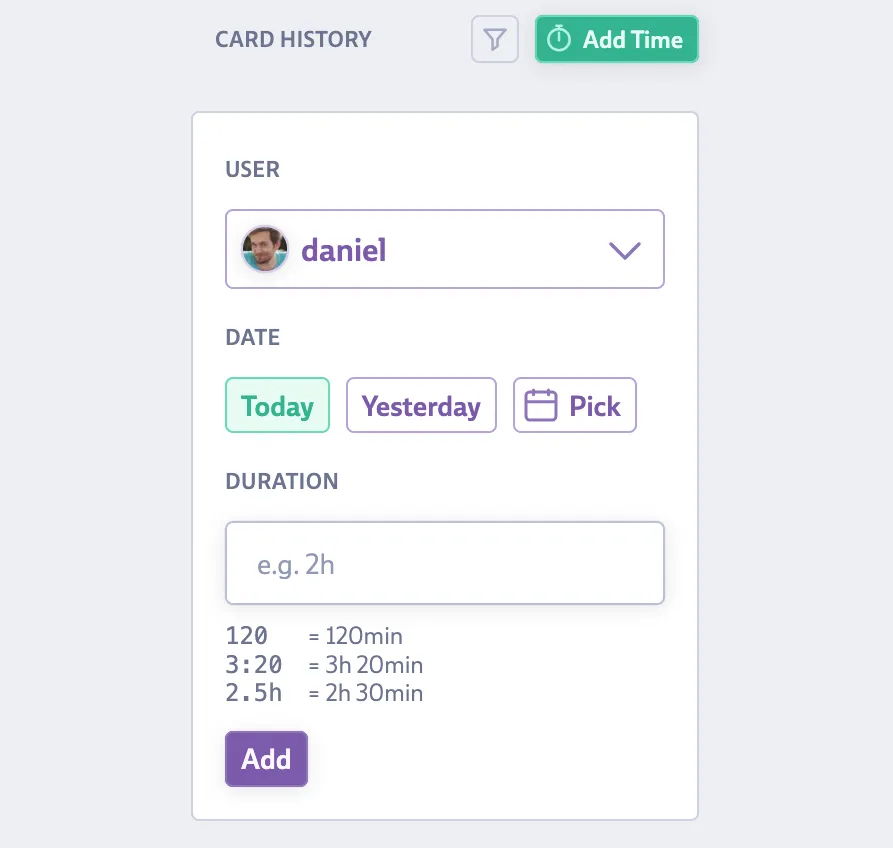
Manual Time Tracking
In this mode the History side panel of an open Card contains an Add Time button which allows to enter and edit time tracking information. Using the button, you may enter time spent and choose the date and time on which this work happened. The entered time tracking data is always associated with your user account.
The history panel also shows previously tracked time. You can correct the tracked time by using the plus/minus buttons next to the time entry to add or remove time in 5 minutes steps (*spent too long at the coffee machine?). You can also click on the time entry itself for an input field offering more extensive editing. You can delete the full time tracking entry by clicking the trash icon next to it.
At the top of the Card history panel you’ll find a Total tracked time entry summing up all time entries on this Card sorted by owner. There is also a small clock icon at the bottom of each Card containing time information. Hovering over it will allow you to check the total amount of time spent at a glance.
The clock icon contains a colored fill that grows as more time is tracked. The filled area increases exponentially with the total time spent on the card, meaning it provides a quick visual intuition for comparing relative time spent between cards, but the relationship isn’t linear (e.g., a half-filled icon doesn’t necessarily mean twice the time of a quarter-filled icon). The area approaches being full asymptotically, meaning it would only theoretically reach 100% fill with infinite time spent.
You can also use time tracking information to sort cards. This is a good way for quickly identifying expensive tasks in your Run, Milestone or Deck view.
Real-time tracking
Enabling real-time tracking, includes all features described above for manual time tracking. In addition, the play button in the top bar of every Card doubles as your timer control — it’s used to start, stop and inspect the timer.
![]()
The play button is the single combined entry point for both starting work and tracking time:
- On your own task cards that are not yet started, clicking it sets the Card to started (blue) and starts your timer in one go. Clicking it a second time only stops the timer; the Card stays in the started state. Use the … (More Options) menu on the opened card to unstart it again.
- On Hero Cards and Doc Cards (which don’t have a started state), the same button only controls the timer.
- On Cards that are blocked, in review, or owned by someone else, you can still start the timer through this button without changing the Card’s workflow state — handy for tracking time you spend reviewing or helping out.
- If a Card gets marked as done or gets archived, all running timers on it will be stopped automatically.
Cards that are actively being time-tracked show a small blue timer widget, no matter whose timer is running. This makes it easy to tell apart cards that have merely been started (blue) from cards that someone is actively working on right now. It works across the whole team — not just for your own cards — and shows up both on mini cards and in Table View.
Here’s some rules around time tracking:
- A single user can only have a single timer running.
- The timer can started on any type of card by any amount of people. This could be useful for e.g. meetings that can be represensented via meeting cards.
Enabling real-time tracking also gives you a handy widget in the bottom left, which highlights your current task and the time spent so far. You can quickly adjust the time spent by using the plus/minus buttons. You can also stop the timer by pressing the stop button on the widget.
In addition the web site title will change so that you can scan the time spent on your browser tab. In case you forget to stop the Card timer you can always manually edit the Card history to fix up the time. In your organization settings you will also find a field to edit the amount of time after which a Card time tracker will stop automatically due to suspiciously effective work segments. If the tracker was automatically stopped, you’ll receive a notication and the widget of the bottom will have turned into a snoozing purple color.
A Card’s history panel also highlights these entries with a snoozing icons until the time entries have been adapted.
Time Tracking Report
You can access the time tracking report via the mission control (open by clicking on the joystick in the top left). The report contains a detailed list of all time tracked by all team members.
You can sort by:
- Start Date / Time
- Duration
- User
- Card
- Project
To filter the table use the filter icons next to the individual table columns to show/hide individual entries. You can filter by date, user and project. At the bottom left you can see the total time tracked in Codecks.
You can export all information for your current filter in CSV format by clicking the export button in the bottom right.