
Text Editor
Cards can be as simple as containing brief task descriptions or as extensive as complex design documents.
Formatting
The card text editor supports the markdown syntax. Once you save the card, it will be rendered in a way that turns your text, lists and headers into nice looking documents.
To help you with the syntax we’ve added some helpers.
Slash Command
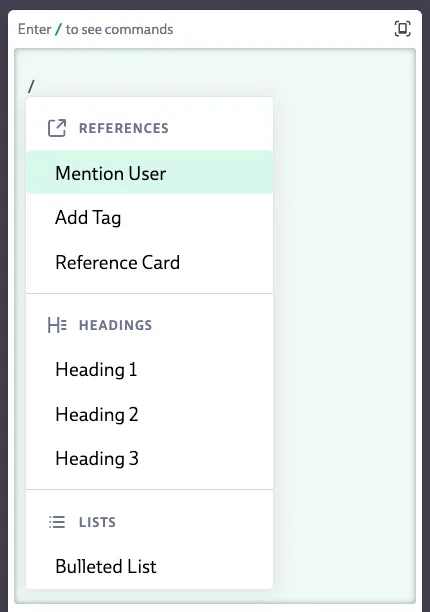
You can type / anywhere in the editor to open this overlay. It’ll allow you to explore both markdown features as well as codecks-sepecific features such as mentioning co-workers or referencing other cards.
Floating Action Bar

If you start selecting text, an action bar will show up allowing you to format the selected text. Available formatting options are: bold, italic, strike through, code and links.
You can also format without reaching for the action bar: select some text and hit cmd/ctrl + b for bold or cmd/ctrl + i for italic. To rearrange your text, alt + up/down moves the current line (or selected lines) up and down.
Preview
If you are unsure how something will look on the final card, you can use the preview mode to see how your formatting will look without having to save the card the first.
Markdown Mini Cheat Sheet
# heading level 1
## heading level 2
### heading level 3
etc

- list element 1
- list element 2
  - can be nested too

1. numbered list
2. second entry

a [link](https://example.com)
inline formatting: _italics_, __bold__, ~~strike through~~, `code`

> quote

```
code block
```
---
horizontal rule
Check out this cheat sheet for more examples like embedding tables or images. Note that Codecks does not support using HTML within markdown.
Focus Mode
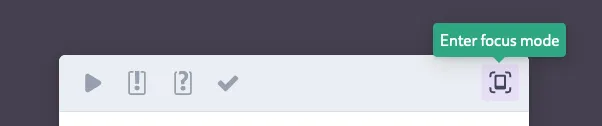
At the top right of an opened card you are able to find the Focus Mode button. Focus Mode allows you to view and edit on a full screen view without any distractions. For even more focus you can enter the Full Screen mode at the top right corner of a card in focus mode.
Checklists
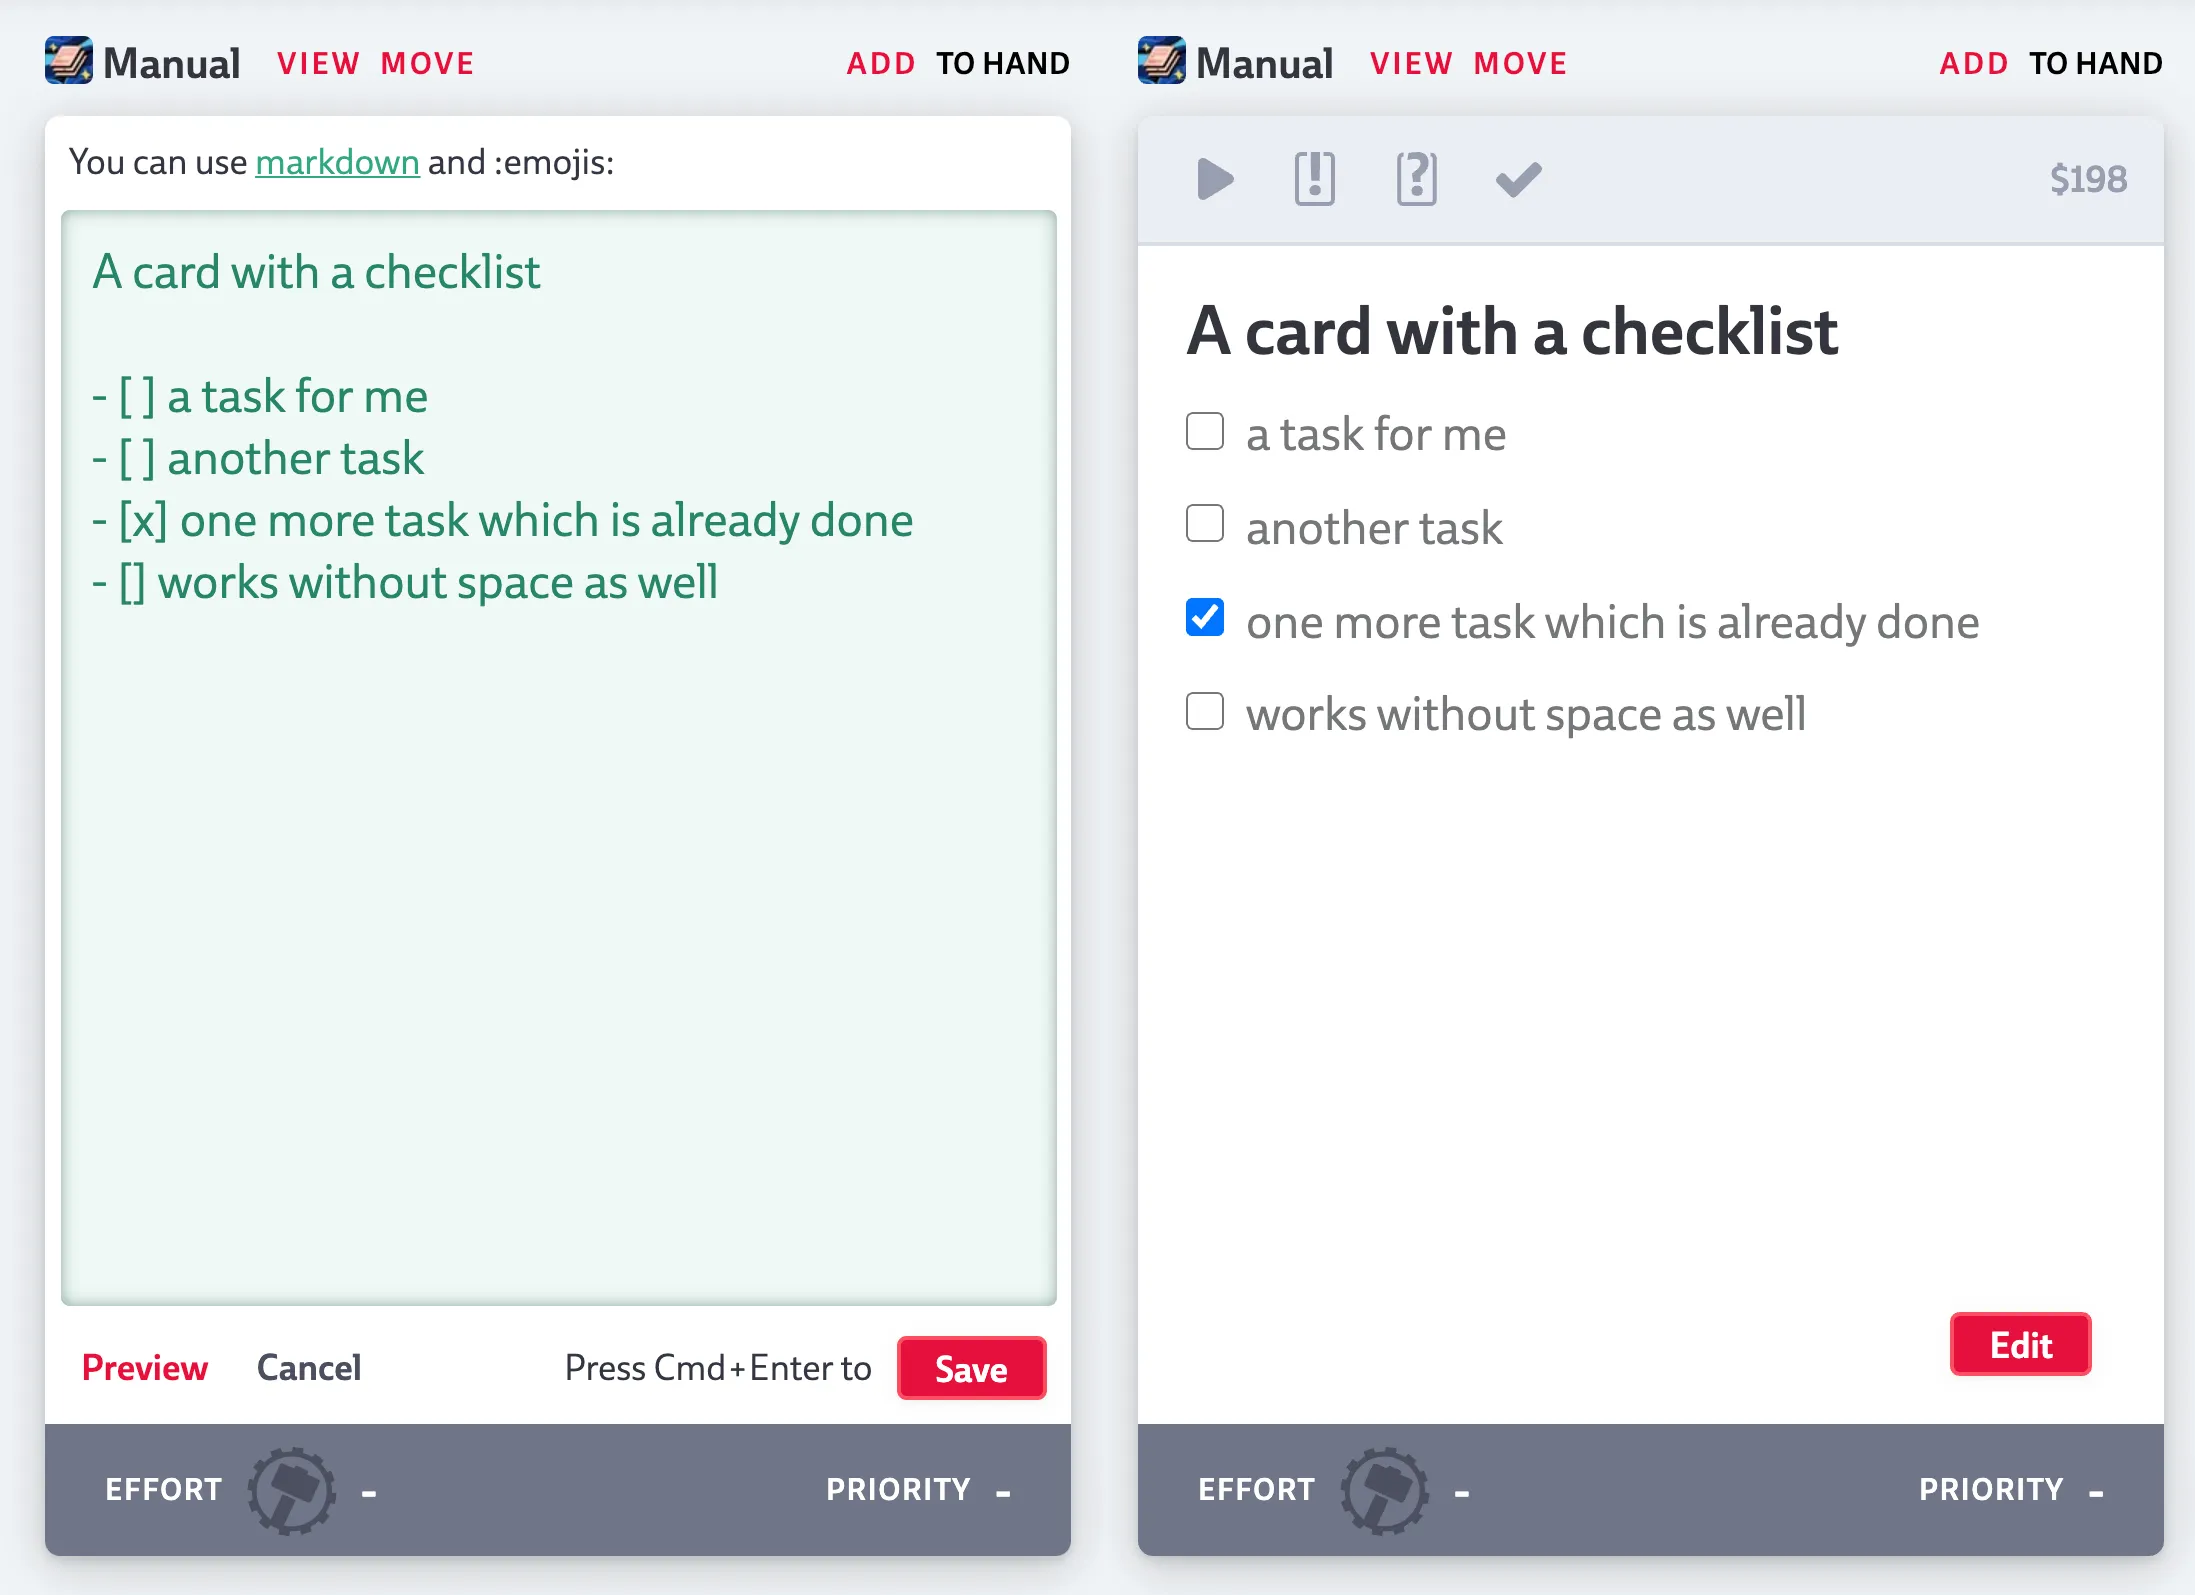
If you want to split up a task into sub steps you may use checklists. The syntax for checklists looks like:
- [ ] a task for me
- [ ] another task
- [x] one more task which is already done
- [] works without space as well
Saving this card text will show a list of checklist items. You can use the mouse to check off the items directly on the card. You can manually create a checked-off checklist item by putting an ‘x’ between the square brackets as shown above. Whenever you mark a checklist item as done using the mouse, the text is automatically updated to stay in sync.
Similar to any other activity, changes to checklists are also visible in the history panel of each card.
Checklists are great for items that are managed on a single card. When a checklist item grows into something that deserves its own card, you can promote it: use the Convert List Items to Sub Cards action in the card’s More Options menu. You pick which list items to convert (incomplete, completed, or all), choose a target Deck, and Codecks creates a Sub Card for each one — replacing the original list items with $-references to the new cards so nothing gets lost. This action is available on regular cards (not private Ghost Cards, and not on cards that are already Sub Cards) that contain list items.
Referencing other cards
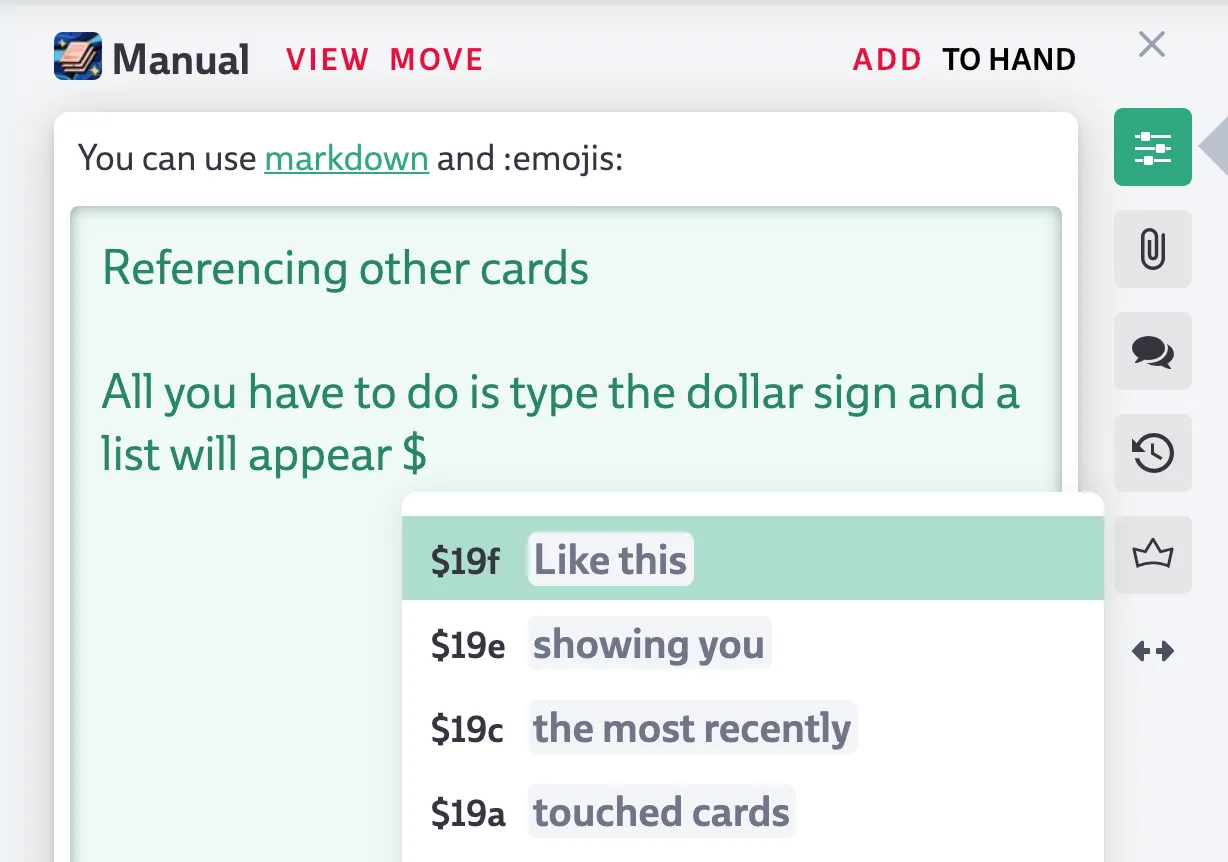
Entering $ will pop open a list of other recently touched cards. You may modify the content of the list by entering a couple more letters to narrow down the search card list. You can also search for multiple words by separating them with _. Select the card you want to reference by using the mouse or by using the arrow keys and confirming with tab or enter. A color-coded link will be entered in the card text.
This is a great way to build multi-card documents in a wiki-style, allowing you to build your full GDD in Codecks. The link shows the title and workflow state of the linked card. Hovering over the link will open a mini preview of the referenced card. If you change the title or workflow state of referenced cards, the link will update its appearance automatically as well. Clicking the link opens the referenced card.
You may also reference another card by copy’n’pasting the URL of another card. It will automatically convert the link into a short-hand reference link. To get the URL of a card you can also just click on the dollar sign label shown on top of each opened card.
URLs of cards contain the title so that other people can already infer what the card is about when you paste it into an email or chat. It is good to know that those links remain valid even if the card content changes, so you don’t have to worry about breaking links by changing the card text.
These references also work inside of comments.
Referencing decks
Similar to cards, you can use $$ to add a deck reference. These deck references will result in clickable elements linking straight to the deck view.
Referencing team members
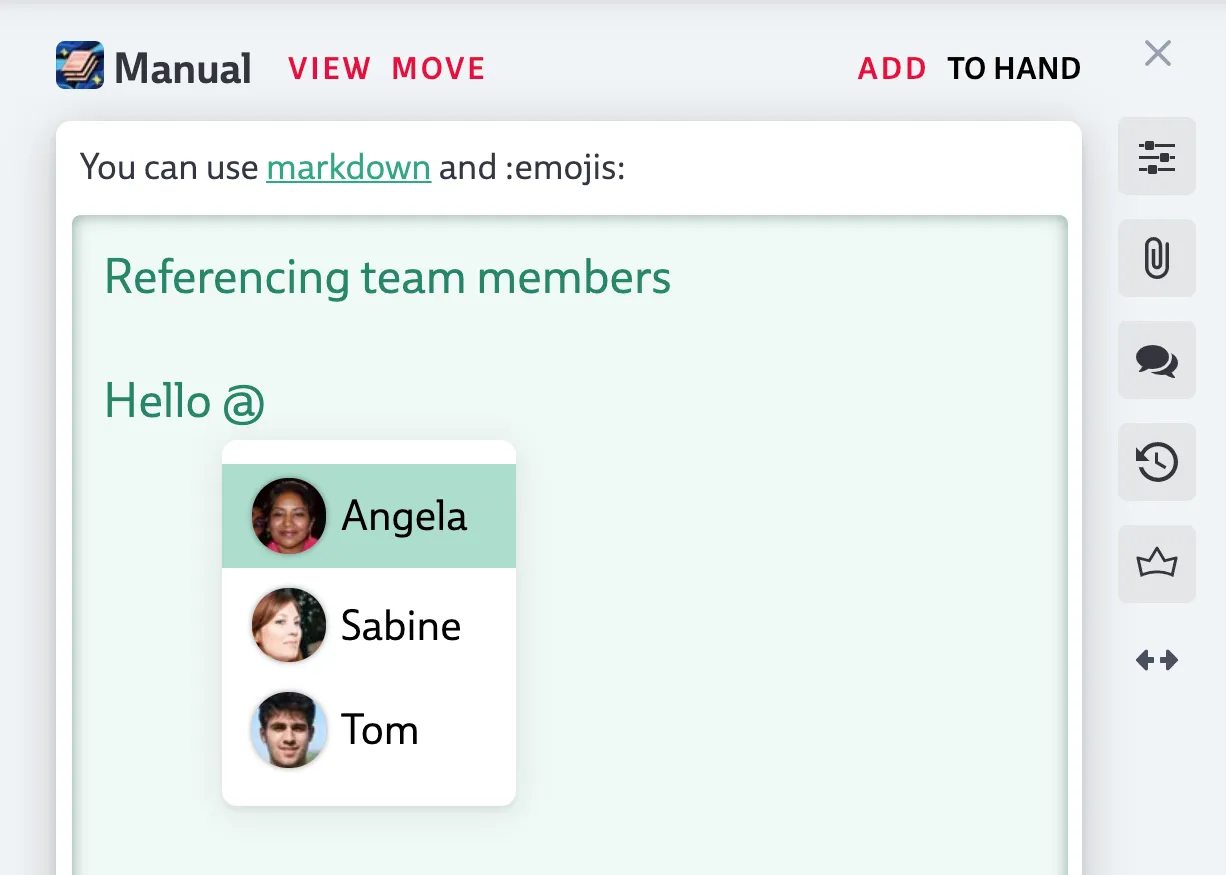
Entering @ will open a list of your team members. You can narrow down the content list by entering some letters of the user name that you want to reference. Selecting an entry via mouse or keyboard will add a link to that user and notify them of the fact that they were mentioned on this card.
Mentioning a user within a card automatically leads to that user watching that card. This means they will receive notifications for important updates to the card.
Mentioning a user within a comment adds them to the conversation if they’re not already present.
Wide Mode
If you want to focus on writing or reading a longer document, you can extend the width of the card container by dragging it with your mouse. This setting will be remembered on your browser.
Emojis
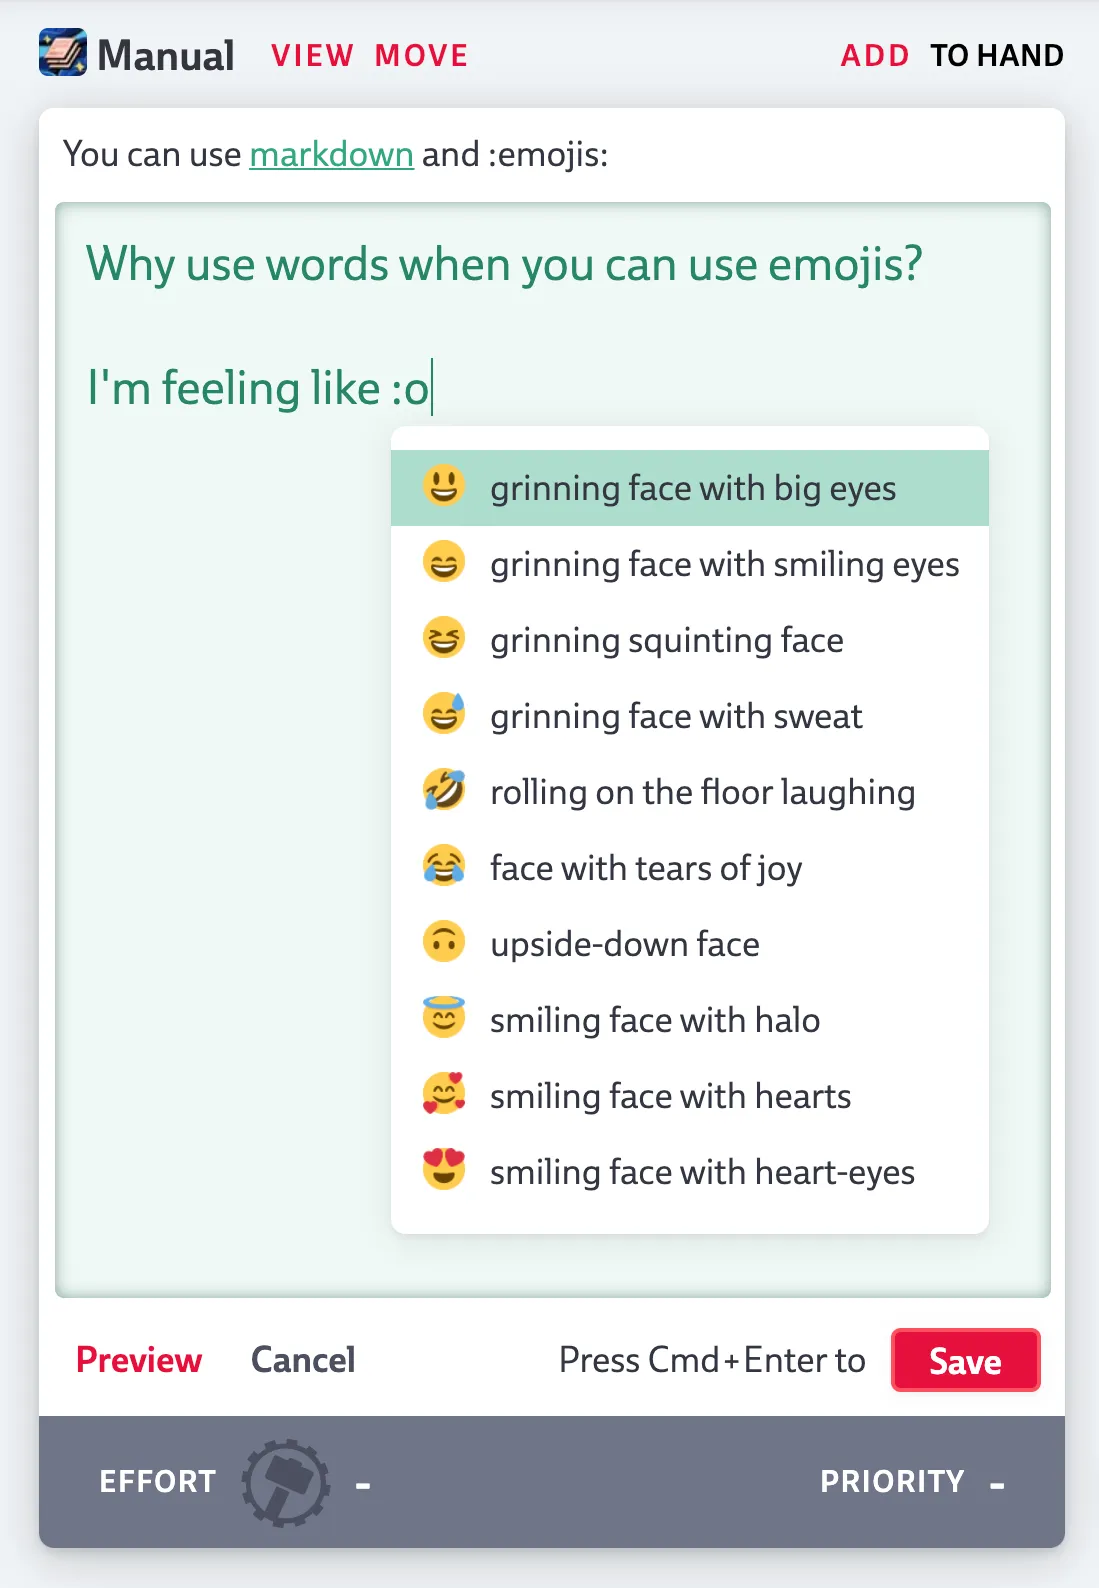
Entering : and a letter will open the emoji selector allowing you to choose an emoji from the list. As you enter more letters the list will be filtered by emojis fitting to your search word.
You don’t have to remember the precise emoji name as we have categorized our emojis via keywords. For example entering :hand will also offer you the :pinchedfingers: emoji although technically the emoji name does not contain the word hand. 🦸
Images & Videos
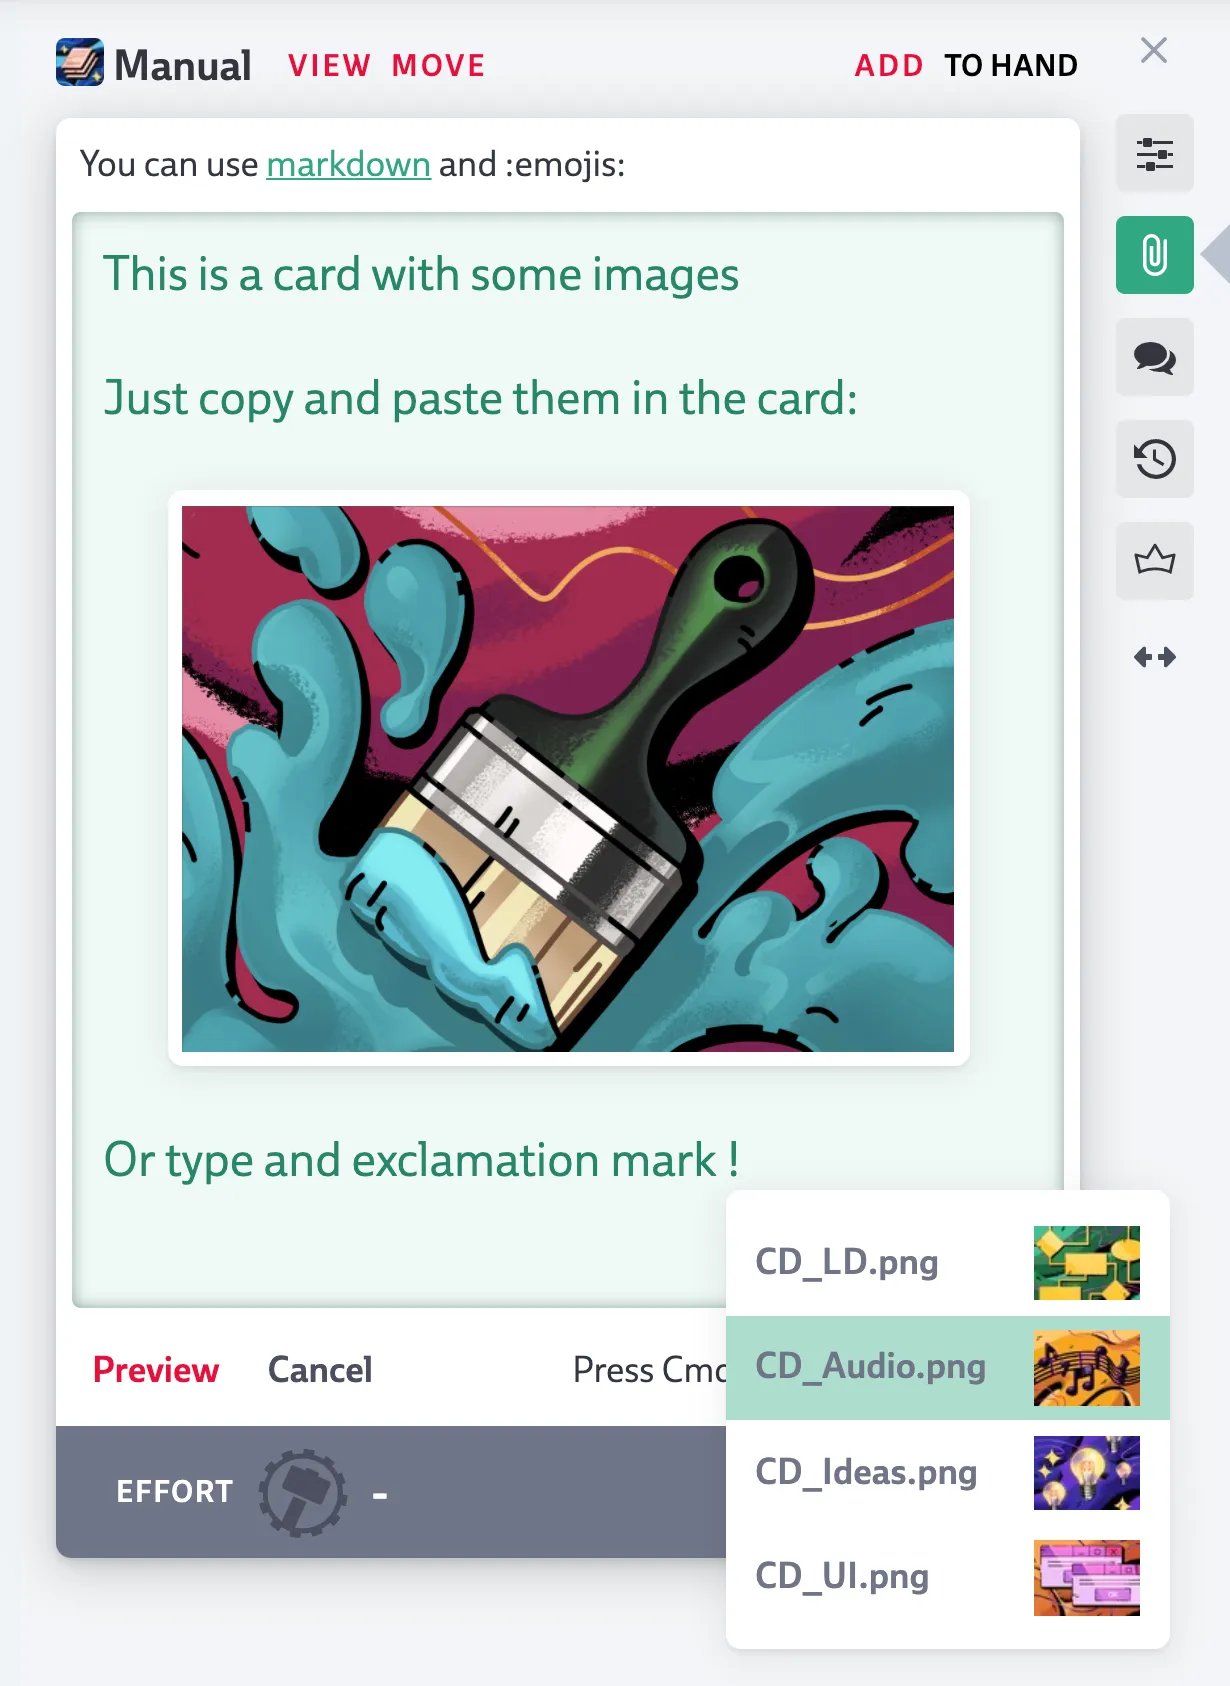
There are two ways to add an image or video to your card or comment:
- If you’ve got an image or video in your clipboard you can simply paste it into the opened editor. It’ll upload the file and add it at your cursor’s location. The file will also be added as an attachment.
- If you already added an image or video as attachment, you can enter
!. This will open a searchable picker of the card’s images and videos. Use your mouse or keyboard to select one, and it’ll be inserted at the cursor’s position.
Inserted images can be viewed with our image viewer. Note that video playback depends on browser support for the provided video file.
Tags
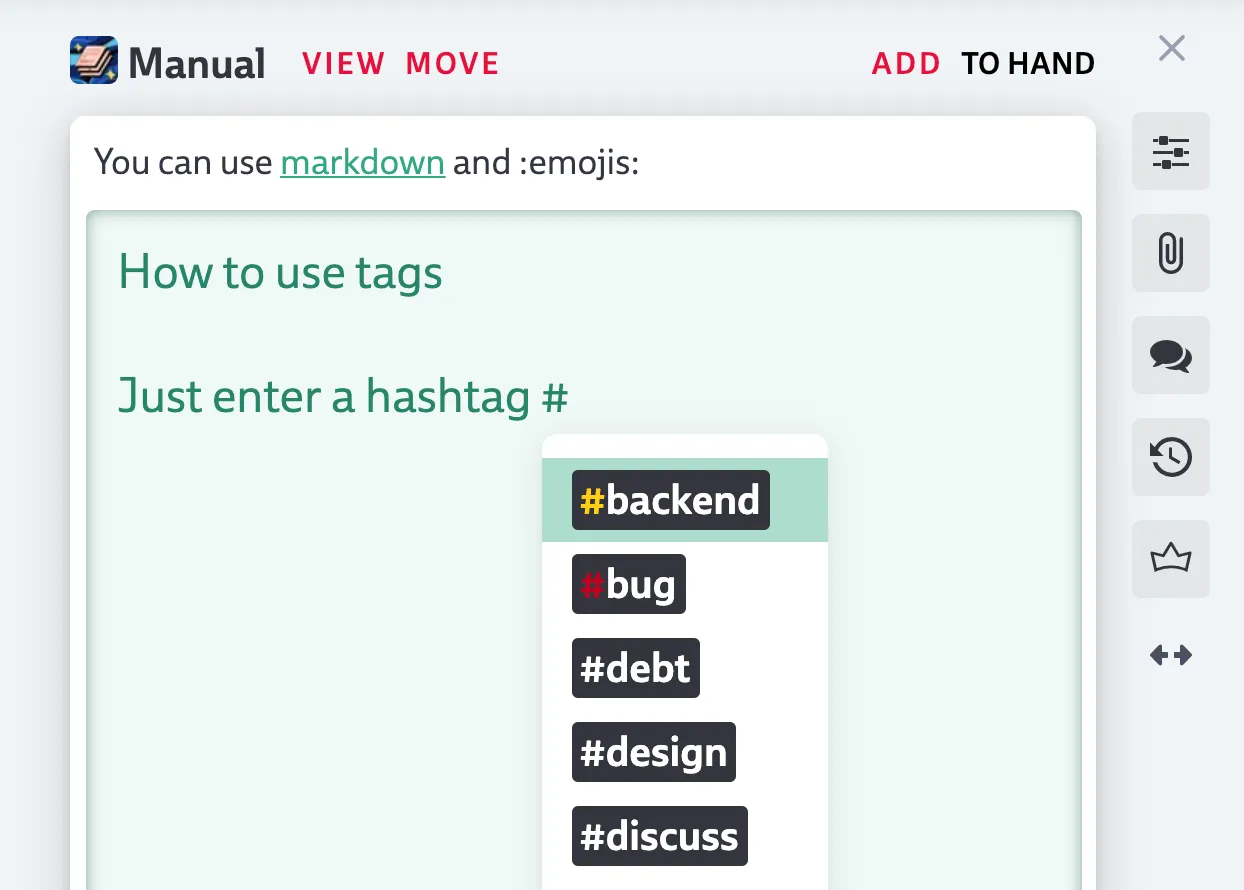
Entering # will open a list of available tags. Typing more characters will filter the list. You can always “invent” new tags by continuing to type without confirming any suggested tags. For more information on how to work with tags and the difference between project tags and personal tags, refer to the Tags section.