
Sorting & Grouping
Codecks comes with a powerful grouping mechanism. Learn how to slice and dice your cards to surface the important stuff.
Basic principles
The order button shows up in three contexts:
- Search results
- Decks
- Milestones
You can find it in the action bar to the left.
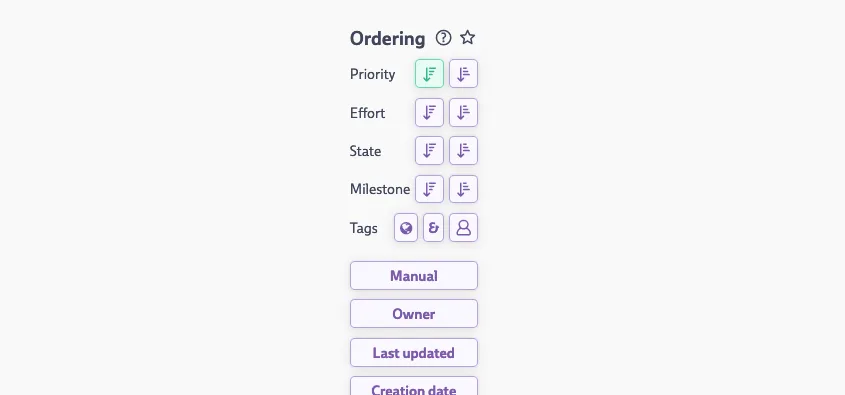
By default, cards will be grouped by Manual in milestones and by Priority everywhere else. By using the order panel (shortcut shift+o) you can pick any of the other available orders:
- Priority*
- Effort*
- Workflow state*
- Tags*
- Owner*
- Run*
- Milestone*
- Last updated
- Creation date
- Creator
- Deck*
- Project
- Title
- Upvotes
- Time tracked
- Due date
- Hero Card*
- Beast Level
- Manual (see below)
To get a more compact view, you can activate the Compact toggle at the bottom. This will group all cards into a single swim lane. Tags do not support a compact view as a card can show up multiple times if it has more than one tag.
Manual Order and Zones
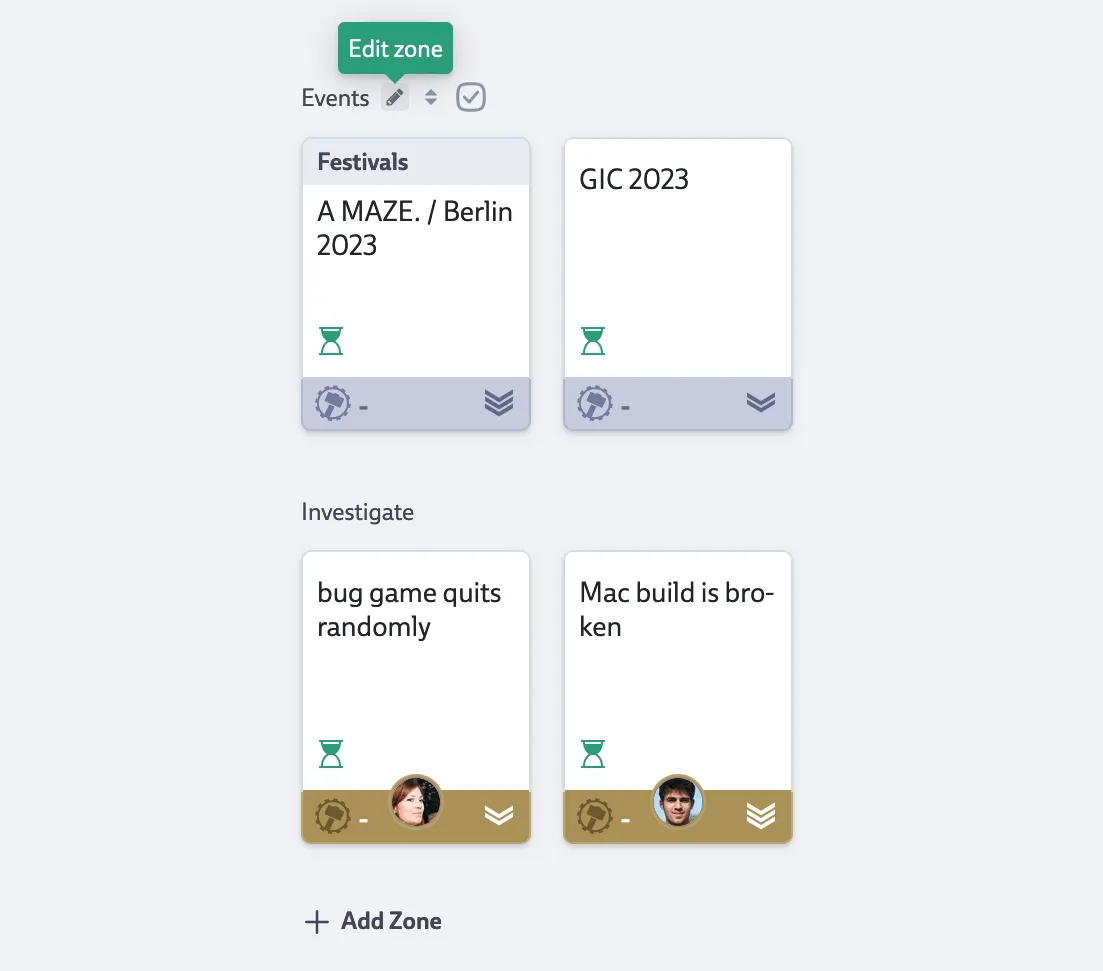
Decks and Milestones have special order: Manual. This allows to define a custom order via drag and drop which is shared amongst the team.
Note that within Manual order, relative positioning of cards is preserved when moving them from one milestone or deck to the next.
Rather than working with predefined swimlanes, Manual order allows you to define Zones. Cards can be freely moved across and within Zones.
If you have the permission to modify the respective Deck or Milestone, you can create Zones via the Add Zone Button at the bottom. If you hover over the Zone name, you can modify its name or change the order. Empty zones can be deleted via the edit dialog.
You can use the + icon at the end of each zone to directly add a new card to it. When cards are added another way (either via moving them into the deck or milestone, or via creating them with the red plus button) they are always added at the end of the top-most Zone.
Table View
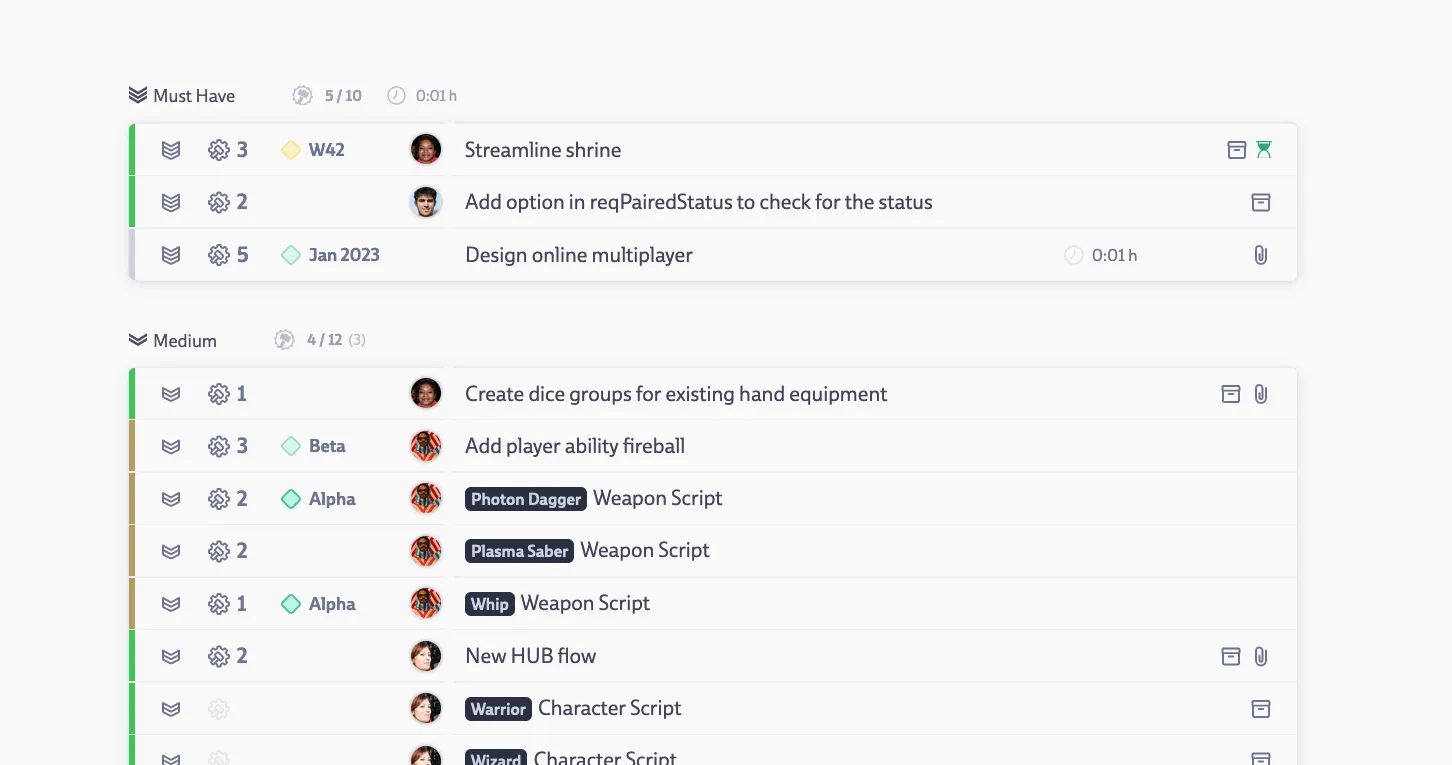
Table View is especially helpful for browsing large deck contents. You can find the option at the bottom of the sort panel. It supports all sorting options as well as the drag and drop operations of both the manual mode and the other supported sorting options.
The swim lane header

The swim lane header consists of up to three parts:
- Swim lane label: Most sorting order allow you to click on the label to add the underlying property as a search entry. This allows you to quickly drill down on interesting properties by continuously iterating search terms and order.
- Select all button: This button only shows when hovering the area with the mouse. It allows you to quickly select all cards of the swim lane. Pro tip: if you selected a single card of a swim lane and hitting
ctrl/cmd + awill select all cards of the current swim lane. Hittingctrl/cmd + aonce again will select all visible cards. - Effort summary: if at least one card in a swim lane has an effort set, this section will be present. It shows the effort of all cards. The number in brackets indicate the number of cards without an effort set. I.e. cards with an effort of “None”.
- Time tracking summary: If at least one card has time tracking information associated with it, this section will be shown. Hovering it will show a pop which breaks down the tracked time by user.#### Secondary search order
For cards that share the same attribute of the primary sort order there’s an implicit secondary sort order. It’s based on priority, then effort and lastly creation date. So if you order by e.g. “Owner”, then high priority cards will be shown first for each owner.
You can overwrite this behavior by ctrl/cmd + click on an order button. This will effectively push the selected sort order in front of the implicit order defined above. So if you picked “Milestone” as a secondary order while keeping “Owner” as primary order it’ll show cards in the nearest milestone first for cards with the same owner. Cards with the same owner and milestone will again use priority then effort and creation date to sort those further.
You can also define more than one secondary search order by ctrl/cmd + clicking on additional buttons. The number next to the button indicates the rank of the selected search order. To reset you can do a normal click on the primary order.
Default View
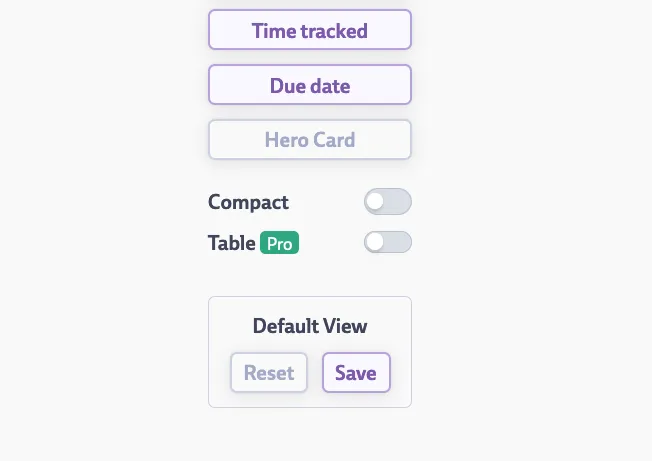
Whenever you apply an order in a Deck, Run or Milestone, this choice will be remembered for your browser.
To share your preferences with your team (or in case of a public deck with your audience), you can define a Default Order. Do this by looking for the corresponding area at the bottom. When team members or visitors see the Deck, Run or Milestone for the first time they will see cards in the preferred order. They can still pick their own order but will see a small hint at the sort icon as a reminder that they might want to go back to the default view.