
Projects
A project is a container for decks as well as an instrument for limiting access within your organization. Each deck belongs to exactly one project. An organization may create multiple projects. On the Free plan you can create up to 3 projects. On paid plans there’s no limit to the number of projects you can create.
Creating a project
By default your account will already contain one project. To create a new project, open the mission control side panel (click on the joystick icon in the top left) and use the add button next to the project’s label. You can use drag and drop to change the sorting position in which your new project is shown. This sorting position is user-specific and won’t affect the order for anyone else in the team.
Setting a project image
You can already assign an image during the creation step. If you want to set the background image of an existing project, drag and drop an image file onto the project tile in the sidebar or use the Project Settings.
Managing visibility
You can use mission control (click on joystick at top) to show and hide projects quickly. Use this depending on whether you want to focus on a single project or prefer to have an overview of everything that is happening.
Click on the checkbox or anywhere on the project tile to show or hide the project. You can also click on the bullseye button to hide all other projects and only show the selected project.
If you hide a project you will not see any cards belonging to decks within that project. You will still see notifications for all projects though, so you won’t miss anything important going on in other projects.
Archiving Projects
If you don’t need active access to a project anymore, you can archive it using its project settings screen. You can access the project settings by clicking the gear icon on the project tile (once you hover your mouse there).
Archived projects are removed from the mission control list and all its cards won’t be visible to you anymore. You may restore archived projects at any time by selecting “Show archived projects” in the Mission Control.
Deleting Projects
In case you feel strongly about not just archiving a project, but completely eradicating any memory of it (we’ve all been there), you can delete it from the project settings screen.
Be aware that there is now way of restoring that data easily. If you regret your choice for any reason, reach out to us and let us know. We might be able to restore your project from backup.
Spaces: Organizing Decks Within Projects
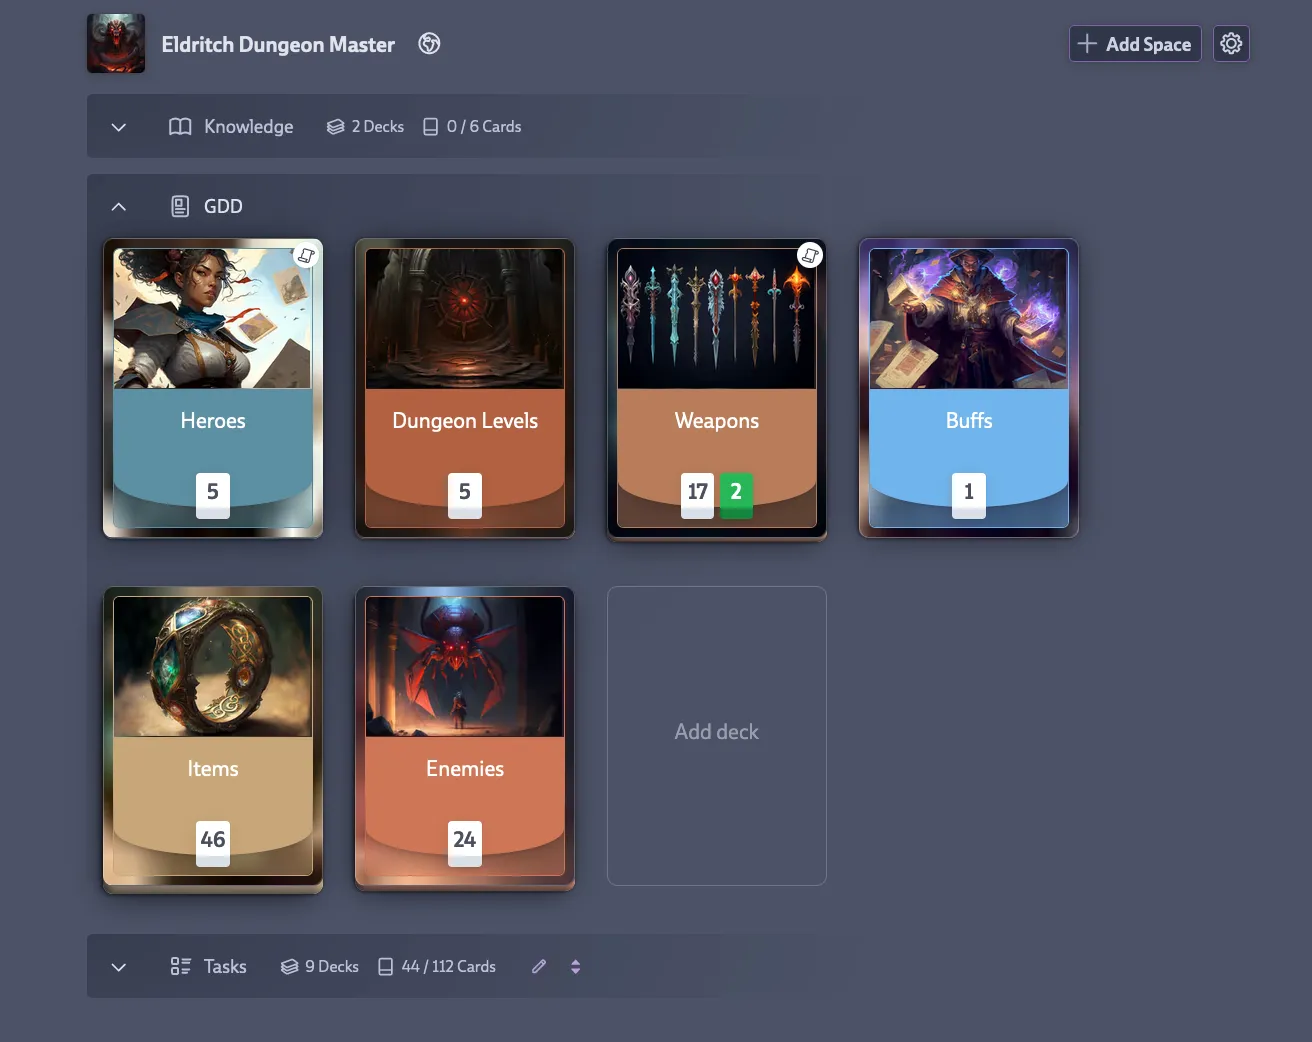
Projects can be subdivided into Spaces to group related decks together. Each project starts with a default space, and you can add more using the Add Space button.
Space Types
When creating a space, you can choose from predefined templates or create a custom one:
GDD (Game Design Documents)
- Icon: 📋 GDD
- Default deck type: Asset Decks
- Purpose: For decks containing your game’s assets (Hero Cards like enemies, weapons, levels, characters)
Tasks
- Icon: ✓ Tasks
- Default deck type: Task Decks
- Purpose: For work area decks (Code, Art, Animation, Audio, Design, QA)
Knowledge
- Icon: 📖 Book
- Default deck type: Knowledge Decks
- Purpose: For documentation decks containing Doc Cards (meeting notes, technical docs, postmortems)
QA
- Icon: 🐛 Bug
- Default deck type: Task Decks
- Purpose: For decks focused on bugs and issues
Custom
- You can create your own space with a custom icon and name
- Default deck type: Mixed Decks (accepts any card type)
The space type determines which deck type is used by default when you create a new deck within that space. For example, creating a deck in your GDD space automatically makes it an Asset Deck, while creating a deck in your Tasks space makes it a Task Deck. You can always change the deck type later if needed.
This space type system is designed to support the recommended structure: GDD space for asset tracking, Tasks space for work organization, and Knowledge space for documentation. But you’re free to organize spaces however makes sense for your team.
Managing Spaces
Once created, spaces can be:
- Edited: Change the name, icon, or default deck type
- Reordered: Drag and drop to change the order (affects the whole team)
- Collapsed: Click the space header to collapse/expand it
- Deleted: Only empty spaces can be deleted (you must always have at least one space)
Decks can be freely moved within and across spaces via drag and drop. Changing the order affects the whole team. Be aware that moving a deck from one project to another might change user access. If this impacts ongoing conversations, you’ll get a warning about how the move will affect discussions. The system will also warn you if card owners don’t have access to the target deck.
To change the order in which projects are shown in the decks view, open Mission Control and drag the project tiles to reorder them.