
Project Setup
This guide shows you how to structure a game project in Codecks following Scope-Driven Production principles.
Starting Point: Templates vs Blank
When you create a new project, Codecks offers genre-based templates (RPG, Puzzle, Action, Strategy, and more) that provide initial scaffolding. Each template includes:
- Pre-configured spaces and decks organized by genre conventions
- Sample asset cards demonstrating the structure
- Suggested tags relevant to that game genre
- Journey templates for common asset types
Templates are inspiration, not prescription. Every game is unique, so treat templates as a starting point that you’ll customize heavily. The structure below represents best practices, but your specific game and team may require different organization. If you’re experienced with Codecks or have a clear vision for your project structure, feel free to skip the templates and start with a blank project.
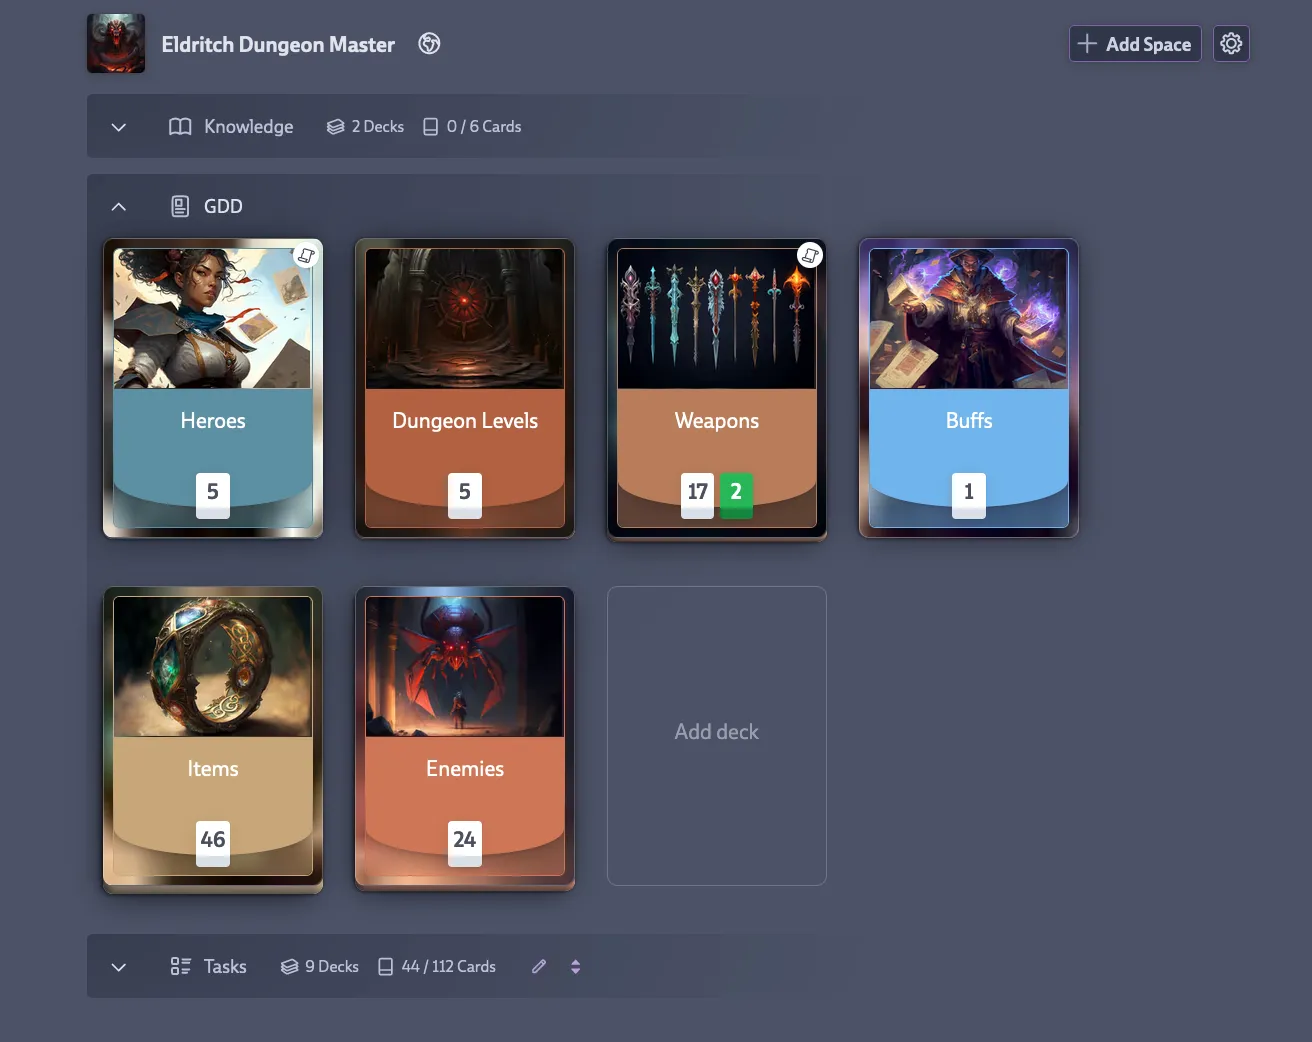
Step 1: Create Your Spaces
Under your project, create three spaces to organize your decks into logical groups. Each space serves a distinct purpose and uses a different deck type to optimize how you work with its contents.
-
GDD Space (Game Design Documents) - Set the default deck type to Asset Decks, then create decks for your asset categories like Enemies, Weapons, Levels, Characters, Systems, NPCs, and Items. Each card in these decks represents one complete asset or feature that will flow through your production pipeline.
-
Tasks Space - Set the default deck type to Task Decks and create decks organized by discipline: Code, Art, Animation, Audio, Design, and QA. These hold the actual work items that individual contributors will tackle, separated by their area of expertise.
-
Knowledge Space (optional) - Set the default deck type to Knowledge Decks and create decks for Meeting Notes, Technical Docs, Design Decisions, and Postmortems. This keeps your documentation organized and accessible without cluttering your production decks.
Step 2: Define Asset Pipelines with Journeys
This is where Codecks becomes powerful. Journeys are reusable templates that define the standard pipeline for each asset type.
Example: Enemy Pipeline
Open your “Enemies” deck → click the Journey button → create these steps:
| Step | Deck | Tags | Effort |
|---|---|---|---|
| Concept | Art | concept-art | 2 |
| Model | Art | 3d-modeling | 5 |
| Rig | Art | rigging | 3 |
| Animate | Animation | - | 8 |
| Implement | Code | - | 5 |
| VFX | Art | vfx | 3 |
| Tune & Polish | Design | - | 2 |
| QA Pass | QA | - | 2 |
What happens: When you create a new enemy and click “Start Journey,” all sub-cards are created automatically in the right decks with the right effort values.
Add Dependencies
Define workflow order with Journey Dependencies to make it clear which work can happen in parallel and which steps must wait. Team members instantly see what’s blocking them and what they can start.
- Sequential work - Animation requires Rig to be complete first (can’t animate without a rig)
- Parallel work - Implementation and VFX both require Animation, but can happen simultaneously
- Final gate - QA Pass requires everything else to be complete before it can begin
Step 3: Get Dual Perspectives
This structure gives you two simultaneous views of the same work.
Asset View (for producers, directors)
Open the Enemies deck and you’ll see all your enemies as Hero Cards. Each card shows completion at a glance - Orc Warrior is 60% done, Fire Elemental is stuck on rigging, Ice Giant hasn’t started. You can quickly track which assets are on schedule, which are blocked, and where effort is concentrated.
Task View (for individual contributors)
Open the Art deck and you’ll see all art tasks across all assets. Artists can find their next modeling task without hunting through individual asset cards. They can sort by priority or view their personal queues while the context about which asset each task belongs to stays visible.
Both views stay in sync automatically. Same cards, different angles.
Step 4: Set Up Milestones and Runs
Break your work into manageable chunks.
Milestones (the “when”)
Create milestones for major releases like “Alpha Build - Dec 2025,” “Vertical Slice Demo,” or “Early Access Launch.” When you assign Hero Cards (assets) to milestones, the sub-cards automatically inherit that milestone, letting you see total effort by discipline. This gives you a clear view of how much art, code, and design work remains for each release.
Runs (the “what’s next”)
Create recurring runs for work cycles, choosing a cadence that matches your team’s pace. Weekly runs work well for fast-paced teams doing early prototyping, biweekly runs are most common and balance planning with execution, while monthly runs suit teams working on large features with slower-paced production. Assign specific sub-cards to the current run, then review completed effort after each run to track your team’s velocity over time.
Step 5: Refine Over Time
As you ship assets and learn what works, continuously refine your setup to better serve your team. The structure should adapt to your needs, not the other way around. Here are common refinements teams make:
-
Update Journeys - Found a missing step in your pipeline? Add “Tech Art Pass” to the Journey template and all future assets will include it automatically.
-
Adjust Effort - After shipping 10+ of an asset type, update the effort estimates in your Journey templates based on actual data to improve future predictions.
-
Split Decks - When a deck grows to hundreds of cards, consider splitting it. “Art” might become “Character Art” and “Environment Art,” or “Code” splits into “Gameplay” and “Engine.”
-
Merge Decks - If two decks each have fewer than 10 cards, merge them together. “Props” plus “Pickups” can become a single “Items” deck.
Common Variations
The structure adapts to different team sizes and project types. Here are the most common ways teams modify the setup to fit their needs:
-
Small Teams / Solo Devs - Simplify by combining Art, Animation, and Audio into one “Creative” deck, using fewer Journey steps, or skipping runs entirely and working directly from your hand. The core principles still apply even with a minimal setup.
-
Large Studios - Add more granular organization with multiple GDD spaces for different areas (Core Gameplay, Meta Systems, UI/UX), split task decks into specific disciplines (Gameplay Code, Engine Code, Tools), or add spaces for Marketing, Localization, and Publishing. Scale the structure to match your team size and production complexity.
-
Live Games / Ongoing Content - Set up repeating Journeys that define your seasonal pipeline. Create a “Season Content” deck with templates for new characters and items, an “Events” deck for limited-time content, and track velocity per season to project future schedules. This creates predictable production cycles for ongoing development.
Video Walkthrough
See this video for our best practice tips for how to build your projects around Journeys:
Next Steps
Once your project structure is in place, deepen your understanding by reading about Hero Cards & Journeys to master asset pipelines and learning sorting and filtering to view your work in different ways. Set up effort tracking and establish baseline complexity values for your asset types, then create your first milestone to define scope and start using runs to measure your team’s velocity. The structure gives you the foundation, but consistent practice with these features gives you the benefits.