
Runs
Sprints are a common tool in the development process. Runs allow you to model your sprints by allowing to set up recurring milestones of a certain length in weeks.
Set up Runs
First ensure Runs are enabled via the Organization Settings > Features section. (They are enabled by default though.)
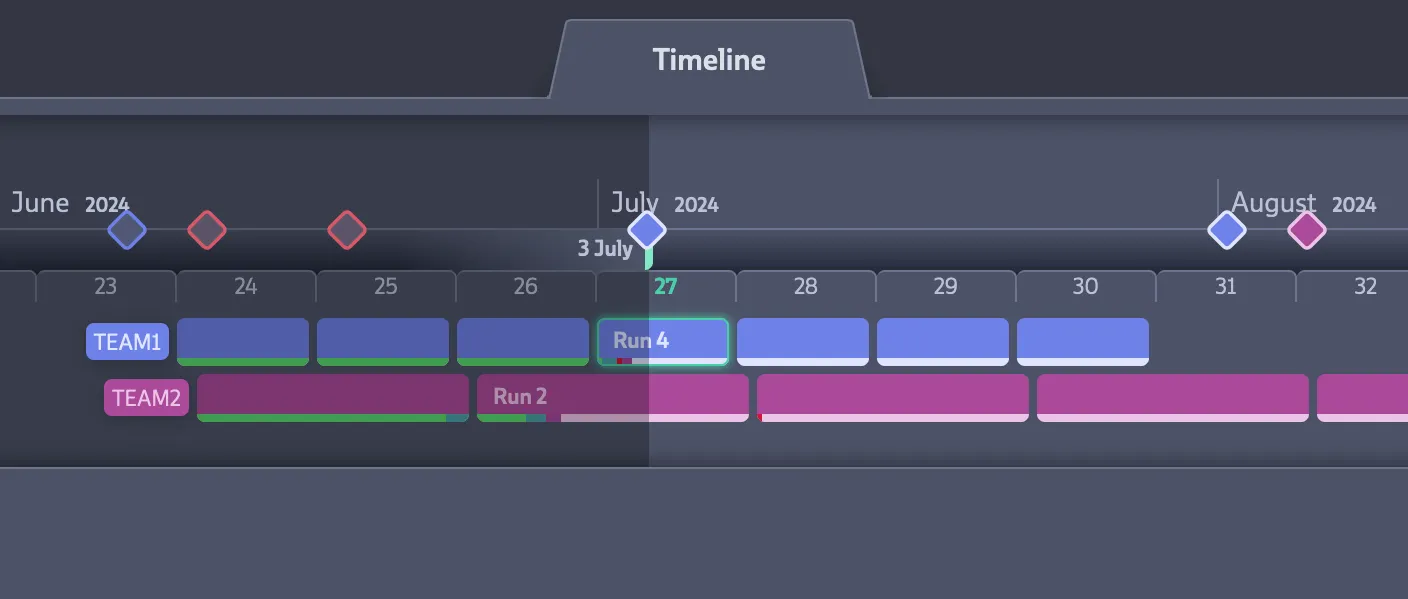
Open the Timeline tab in the header or press Shift + 3 on your keyboard.
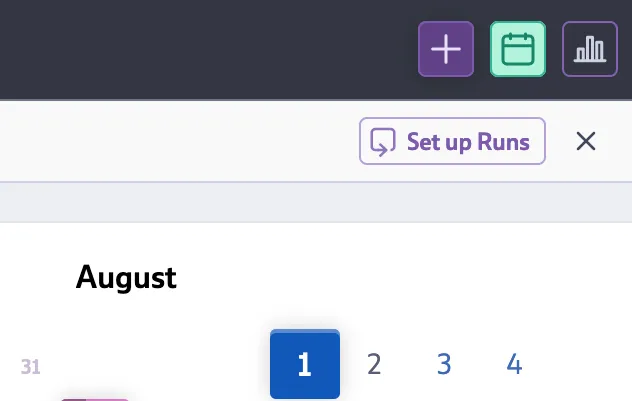
Look for the ➕ icon at the top right. A Calendar opens which includes a Set up Runs button in the header.
Set up a Run Configuration
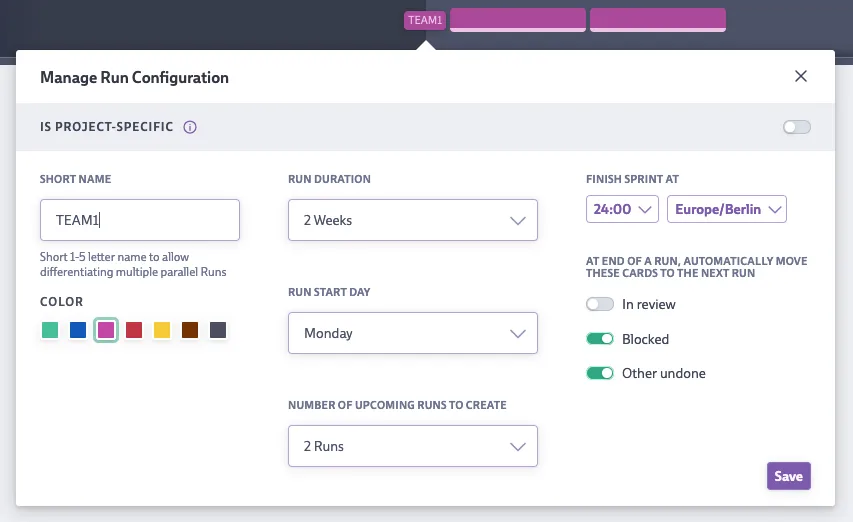
- Short Name: Up to 5 letters. Helpful to differentiate Runs in case there exist parallel Run Configurations.
- Color: The color in which the Runs are shown throughout the app.
- Project-specific: If left unchecked the generated Runs will be global ones, that can contain Cards from any project. If you make it project-specific, it will only be shown on the timeline if the associated project is currently visible as well. This mechanism can also be used to hide certain Runs from team members that don’t have access to the respective project.
- Run duration: How many weeks a Run is active
- Run start day: This option differs depending on whether you are creating or updating a Run Configuration. When creating a Run Config, you can pick a start date from a calendar. When editing, you can change the weekday the Run starts.
- Number of upcoming Runs to create: This number also includes the currently active Run. Once a Run has been finished, a new one is automatically created.
- Finish Sprint At: Define the time and time zone at which the Run shall end. Note that 0:00 refers to the beginning of the specified end day, while 24:00 refers to the end of that day.
- Finish Behaviour: Here you can configure which Cards should be automatically moved to the next Run once a Run is finished.
All settings can be changed later on. Updating the Run duration will only impact the currently running or future Runs. Updating the start day will only impact future Runs and prolong (or shorten the current one).
Run Automations
Look for the 🤖 icon in the Run Inspector to set up a couple of useful automations:
-
Auto Milestone
Codecks automatically applies the selected milestone to any card added to this Run.
-
Auto Assign Started Card
This Option automatically adds started Cards to the Run, unless they’re already in another Run.
-
Auto Assign New Card
New Cards from the Run’s projects will be automatically suggested for the Run. You can adjust this before saving the Card.
Note that option 2. and 3. might result in a situation where a Card could be applied to multiple Run Configurations if their projects overlap. In that case the Run Config is chosen whose current Run’s end date is closest.
Run Description, Statistics & User Capacity
Once a Run is opened, you can click on the i button below the Add Card button on the left. This will show you the description box as well as statistics about the Run including a burndown chart. The description area allows you to update the description and upload a cover image. This image will also be used for the Run’s tooltip.
The shown velocity is accumulating done Cards from the full Run Configuration.
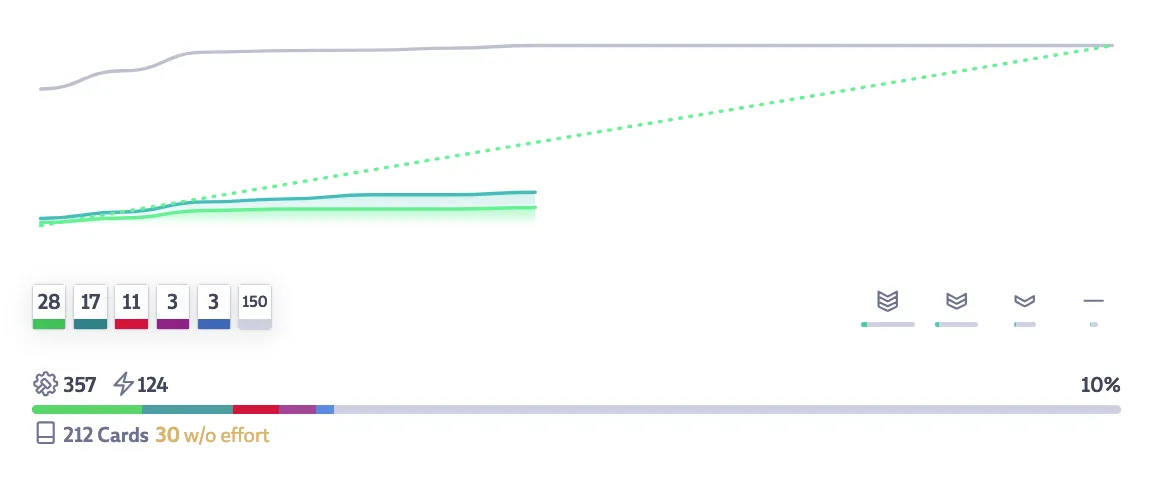
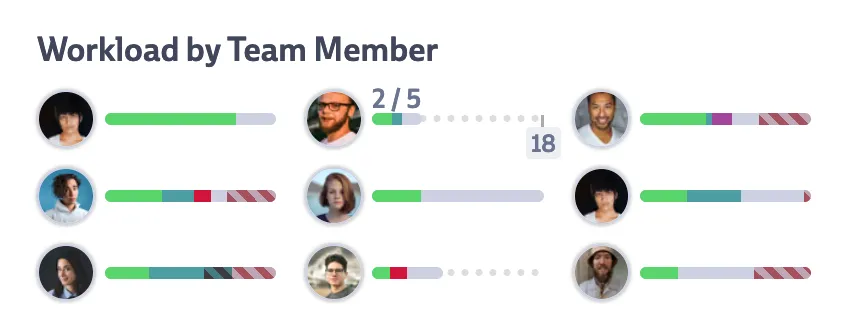
This view also includes Capacity Tracking. It shows how work is distributed across your team mates. You can set the individual capacity of each team member to see who might be overbooked or out of work. Look for the ⚙️ icon at the top right to set and modify the capacity for each user.
If a user is overbooked, the line chart will show striped overlay. If a member still has capacity left, it will be represented with dots. Users are sorted by the percentage of work done (based on work assigned, not capacity). Note that when editing Capacities, the tooltip shows the Historical Workload for a user helping to identify a good value for future workloads.
The Run header also shows your personal capacity vs work load at a quick glance.
Deleting Runs
You cannot directly delete a Run Configuration, but you can delete active or future Runs. Deleting a Run sets an implicit stop date for that Run Configuration beyond which no new Run is started even if you change e.g. the Run duration. You can remove the Stop date to resume the Run by opening the Run Configuration via the cog icon ⚙️ on an opened Run.
Adding Cards to a Run
There are various ways to do so:
- Open the Card properties by clicking the properties button on the top right side of an opened Card, you can find the Run picker below the priority and effort properties. Click the “Pick” button to select either upcoming or past Runs.
- Select multiple Cards and use the bulk action milestone button to add multiple Cards to the same Run.
- Order your Cards by Run to drag Cards between different Run lanes.
- Click on the Run icon on any Card to open the Quick Settings.
There can only be one Run assigned to a Card. To distribute a task over multiple Runs you can consider using Hero Cards.
Beast Mode
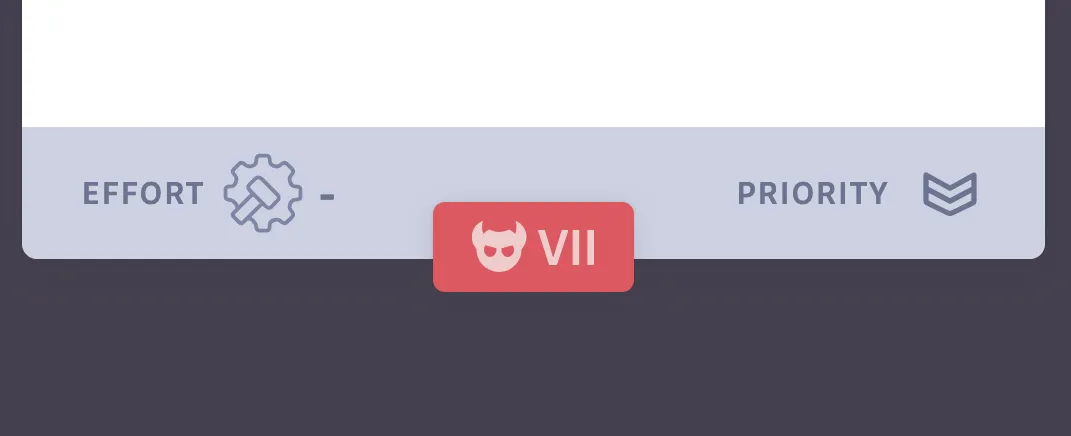
Beast Mode tracks Cards that get pushed from one Run to the next, keeping you aware of what’s slipping through the cracks. The more a Card moves, the stronger its Beast level grows.
A Card within a Run with active Beast mode may be in two states:
- Pending: Cards entering the Run will start out in the
Pendingstate. Cards can be moved to different Runs without increasing their Beast level. Cards in thePendingstate have aNEWlabel at the bottom. - Locked in: After the grace period has passed, Cards will be locked in. Once locked in, Cards won’t be able to move out of this Run without increasing their Beast level.
When opening a Run, you will find the Beast icon in the Run’sheader bar. Codecks offers multiple options to configure Beast Mode.
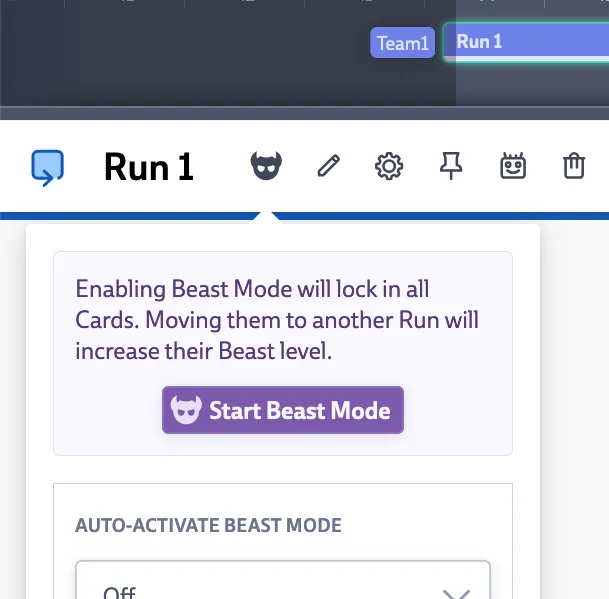
-
Manually start Beast mode: hitting this button will lock all Cards within the Run that have been in the Run for longer than the grace period. This button is available even if you’ve set up the “Auto Activate” option below. Once Beast Mode is active, the Beast icon will turn red.
-
Auto-activate Beast Mode: Allows you to set up the number of days after which Beast Mode is activated. This setting affects all Runs within this Run Configuration. Once scheduled, the Beast icon will turn yellow.
-
Beast Grace Period: The grace period determines how long a Card might be in a Run with activated Beast Mode before being locked in. If a Card has been added to a Run before the Run has started, the Run’s start time will be considered for the grace period.
Beast Mode is a feature available in the Pro plan.
Working with Runs
Run Icons
Cards with a Run will show a small circular-ish arrow icon. Hover over the icon to see more information about the current state of the Run.
Cards with a past Run will show an empty Icon. The current one will be filled whereas future ones are also filled but show a dashed outline.
Run Tab in the Hand
This section displays all Cards you own across your current Runs. You’ll see all Runs you have access to. Runs are ordered as follows:
- Runs where you own no cards appear in the bottom group
- Within each group, Runs are ordered by end date, with those ending soonest at the top
For each Run, Cards are grouped by Zone as defined by the Run’s manual order. You can drag and drop Cards within this section or move them to your Hand above. Click on a Run’s name to open the full Run view in the Timeline.